I write New Adult Contemporary Romance. In this genre, many authors like myself will write from a dual point of view. This can make things very tricky when you’re writing and editing a novel, as it was for me when I was first writing Cousins. I had no quick way of visually seeing what chapters were in what point of view in Word and even when I first started using Scrivener, I didn’t know what to do. But it’s super easy to label your scenes and chapters with a point of view in Scrivener. I’ll show you:
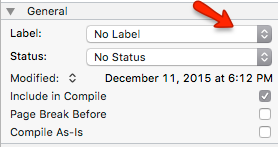
In the right hand column of Scrivener, in the notes section, scroll down to the “General” section where you will see this image. You will be working with the Label drop down area. When you drop this down you will see default labels such as: notes, chapter, scene, etc. But the cool thing about Scrivener is that you can EDIT these labels.
1. Click on the label drop down button and then click on EDIT.

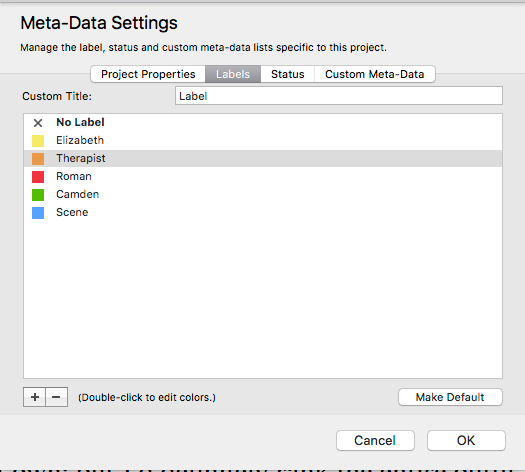
2. When you click on EDIT, a Meta-Data box will open where you can start filling out your label information like this:

3. Simply click on the color label you’d like and edit the NAME of that label. You can add or eliminate labels and play with the colors. Then click OK to save.
4. Now that you’ve made your labels, you go back to the chapter or scene you were working in and select the label that is appropriate for that scene. For example, when I write scenes written in the point of view of my protagonist Elizabeth, I select the yellow Elizabeth label.

5. If you view your entire manuscript in corkboard mode, you will see that all your cards have been color coded by their labels in the right hand corner. That means with a quick glance, you can see a synopsis of each of your scenes and whose point of view each are in!
So true. Honesty and everything reicdnozeg.